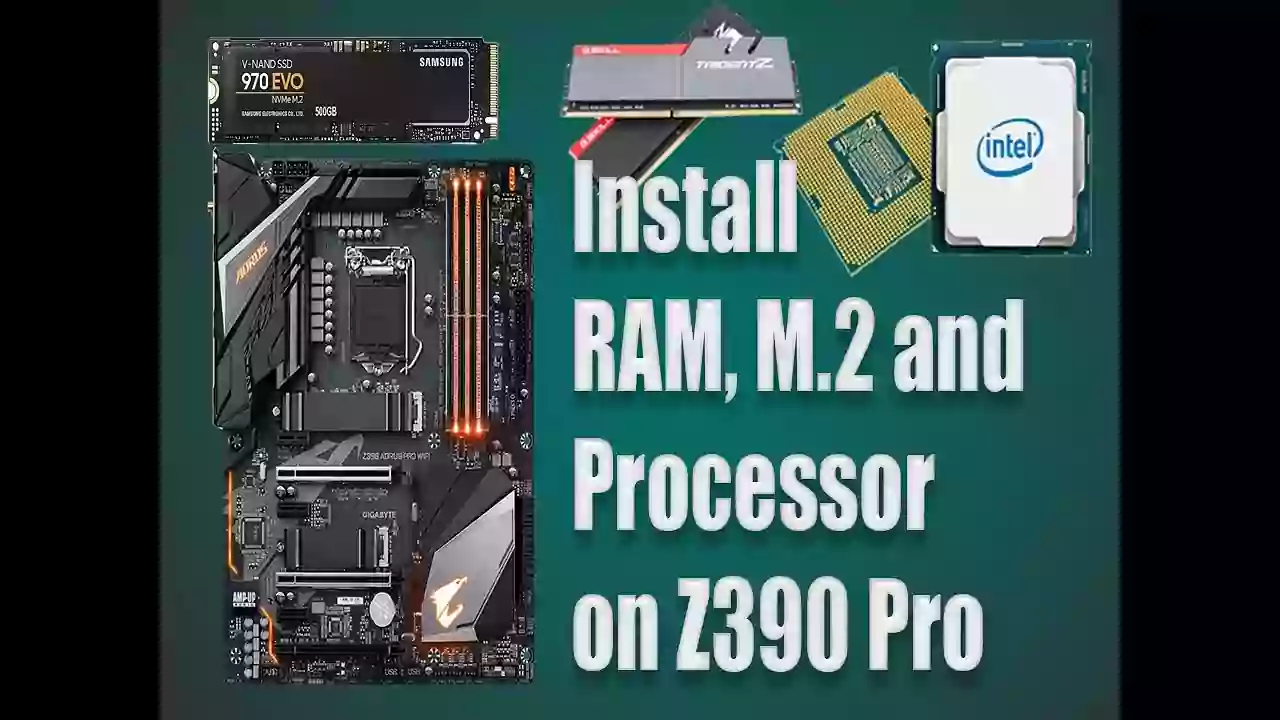
Upgrading your PC with new hardware like a processor, RAM, or an M.2 SSD can significantly boost its performance. While it might seem daunting for beginners, with careful preparation and a step-by-step approach, it's a manageable and rewarding task. This guide will walk you through installing an Intel Core i7-9700K processor, DDR4 RAM modules, and an M.2 NVMe SSD onto a GIGABYTE Z390 AORUS Pro motherboard.
Before You Begin: Essential Preparations
Proper preparation is key to a smooth installation process. Gather your components and tools, and ensure you're working in a safe environment.
Components You'll Need:
- GIGABYTE Z390 AORUS Pro Motherboard (or similar Z390 motherboard)
- Intel Core i7-9700K Processor (or compatible 8th/9th Gen Intel CPU)
- DDR4 RAM Modules (check motherboard manual for compatibility and speed support)
- M.2 NVMe SSD (ensure it's the correct key type, usually M-Key for NVMe on this board)
- CPU Cooler (the i7-9700K does not come with a stock cooler, so you'll need an aftermarket one)
- Thermal Paste (if not pre-applied to your CPU cooler)
Tools Required:
- Phillips head screwdriver (magnetic tip recommended)
- Anti-static wrist strap or anti-static mat (highly recommended to prevent static damage)
- Zip ties or Velcro straps for cable management (optional, for a cleaner build)
- A non-carpeted, well-lit workspace
Important First Steps:
- Read Your Manuals: Seriously! Your motherboard manual is your best friend. It contains specific diagrams and instructions for your board. Also, check the manuals for your CPU cooler and M.2 SSD.
- Anti-Static Precautions: Static electricity can kill PC components. Wear an anti-static wrist strap connected to a grounded metal object (like your PC case, once it's plugged in but turned off at the PSU switch). Work on a hard surface, not carpet. Touch a grounded metal object frequently if not using a wrist strap.
- Prepare Your Motherboard: Place the motherboard on its anti-static bag or the cardboard box it came in. This provides a safe, non-conductive surface to work on.
Step 1: Installing the Processor (CPU)
The CPU is the brain of your computer. Handle it with care, touching only the edges.
- Open the CPU Socket Lever: Locate the CPU socket on the motherboard. There will be a small metal lever next to it. Gently push down on the lever and move it outwards to release it, then lift it all the way up. The socket retention bracket may also lift.
- Remove Socket Cover: If there's a plastic protective cover on the socket, it will usually pop off when you open the lever, or you can remove it now. Keep this cover; you might need it if you ever remove the CPU and store the motherboard.
- Align the CPU: Take your Intel i7-9700K. Notice a small golden arrow or triangle on one corner of the CPU. Align this arrow with the corresponding triangle or notch on the CPU socket. There will also be notches on the sides of the CPU that align with keys in the socket.
- Gently Place the CPU: Carefully lower the CPU straight down into the socket. It should sit flush and drop into place without any force. If it doesn't, double-check the alignment. Do not force the CPU!
- Close the Socket Lever: Once the CPU is correctly seated, lower the retention lever back down, tucking it under the retaining clip. You might need to apply a bit of firm pressure; this is normal. The plastic socket cover (if it didn't pop off earlier) should detach as you close the lever.

(Placeholder image suggestion for CPU installation. Update with your actual image if available)
Step 2: Installing RAM (Memory Modules)
RAM provides short-term memory for your PC. The GIGABYTE Z390 AORUS Pro supports dual-channel DDR4 RAM.
- Identify RAM Slots: Your Z390 AORUS Pro has four RAM slots (DIMMs). For a dual-channel configuration with two RAM modules (which is typical), you'll usually use the 2nd and 4th slots from the CPU (often labeled A2 and B2). Consult your motherboard manual for the recommended slot configuration.
- Open the Clips: Open the retaining clips at one or both ends of the RAM slots you intend to use. Some motherboards only have clips on one side.
- Align the RAM Module: Each RAM module has a notch on its bottom edge (the contact edge). This notch is off-center and must align with a small ridge in the RAM slot. This prevents incorrect installation.
- Insert the RAM: Align the notch and gently press the RAM module straight down into the slot. Apply firm, even pressure on both ends of the module until it clicks into place and the retaining clips snap shut, securing the RAM. You should hear a distinct click.
- Repeat for Other Modules: If installing multiple modules, repeat the process for the other recommended slots.
Step 3: Installing the M.2 SSD
M.2 SSDs offer fast storage and connect directly to the motherboard.
- Locate M.2 Slots: The GIGABYTE Z390 AORUS Pro has two M.2 slots. They might be covered by heatsinks ("Thermal Guards"). If so, unscrew and remove the heatsink first. Your motherboard manual will show the slot locations (e.g., M2A, M2M).
- Check Standoff: There should be a small standoff screw pre-installed or in your motherboard accessory bag. Ensure this standoff is in the correct position for the length of your M.2 SSD (e.g., 2280 is a common length). The M.2 SSD will have a semi-circular cutout at one end for the screw.
- Insert the M.2 SSD: Hold the M.2 SSD by its edges. Insert the connector end (with the gold contacts) into the M.2 slot at an angle (usually around 20-30 degrees). It should slide in smoothly.
- Secure the M.2 SSD: Gently press the other end of the M.2 SSD down towards the standoff. Secure it with the small M.2 screw that likely came with your motherboard or M.2 SSD. Don't overtighten.
- Reattach Heatsink (if applicable): If your M.2 slot had a thermal guard/heatsink, remove any protective film from the thermal pad and reattach the heatsink over the M.2 SSD.

Step 4: Installing the CPU Cooler & Thermal Paste
The Intel i7-9700K requires an aftermarket CPU cooler. Proper cooling is vital.
- Apply Thermal Paste (If Needed): If your CPU cooler's base doesn't have pre-applied thermal paste, you'll need to apply it. Clean the top of the CPU (the Integrated Heat Spreader or IHS) with isopropyl alcohol and a lint-free cloth. Apply a small, pea-sized dot of thermal paste (or a thin line, depending on the paste and cooler instructions) to the center of the CPU IHS.
- Mount the CPU Cooler: Follow the specific instructions provided with your CPU cooler. This usually involves attaching a mounting bracket to the motherboard around the CPU socket and then securing the cooler itself to this bracket. Ensure it makes firm, even contact with the CPU.
- Connect Cooler Fan: Plug the CPU cooler's fan cable into the "CPU_FAN" header on the motherboard. This is usually a 4-pin header located near the CPU socket.
Step 5: Connecting Cables and Powering On (Initial Test - Optional)
At this point, with the CPU, RAM, M.2 SSD, and CPU cooler installed on the motherboard, some builders prefer to do an "out-of-case" test boot (also known as a bench test). This involves connecting the PSU, graphics card (if your CPU doesn't have integrated graphics or you plan to use a dedicated one), and monitor to the motherboard placed on its box. This helps confirm the core components are working before installing everything into the PC case.
If you're proceeding to install into the case:
- Install motherboard standoffs in your PC case if they aren't pre-installed.
- Carefully place the motherboard onto the standoffs and secure it with screws.
- Install your graphics card (if any) into the primary PCIe x16 slot.
- Connect all necessary power cables from your Power Supply Unit (PSU):
- 24-pin ATX power connector to the motherboard.
- 8-pin (or 4+4 pin) EPS CPU power connector to the motherboard (usually near the CPU).
- PCIe power connectors to your graphics card, if required.
- Connect front-panel connectors from your case to the motherboard (power button, reset button, HDD LED, power LED, USB ports, audio jacks). Refer to your motherboard manual for the correct pin layout – this can be tricky!
- Connect your M.2 SSD (already installed) and any other storage drives (SATA SSDs/HDDs) with data cables and power.
Step 6: First Boot and BIOS Access
Once everything is connected:
- Double-check all connections.
- Plug in your monitor, keyboard, mouse, and the PSU power cord.
- Turn on the PSU switch at the back.
- Press the power button on your PC case.
- If everything is installed correctly, the PC should power on. Fans should spin, and you should see a display on your monitor, often the motherboard manufacturer's logo (AORUS in this case).
- Enter BIOS/UEFI: Immediately start pressing the designated key to enter the BIOS/UEFI setup (usually DEL, F2, F10, or F12 – your motherboard manual or boot screen will specify).
- In the BIOS, check if the CPU, RAM (correct amount and speed), and M.2 SSD are detected. You can also set the boot order to prioritize your OS installation media.
That's it for the core component installation! Your next steps would typically involve installing your operating system (like Windows) onto the M.2 SSD.
About the GIGABYTE Z390 AORUS Pro
The GIGABYTE Z390 AORUS Pro is a popular motherboard choice for Intel's 8th and 9th generation Core processors like the i7-9700K. It offers a robust 12+1 phases digital VRM solution for stable power delivery, advanced thermal design with effective heatsinks, dual M.2 slots with thermal guards, and features like Intel Gigabit LAN and RGB Fusion 2.0 for customization, making it a solid foundation for a high-performance gaming or productivity PC.
Conclusion
Installing PC components can be meticulous, but by following these steps carefully and consulting your manuals, you can successfully upgrade or build your machine. Take your time, be gentle with the components, and enjoy the satisfaction of building your own PC! If you encounter any issues, don't hesitate to refer back to your motherboard manual or seek help from online communities or technical support.


