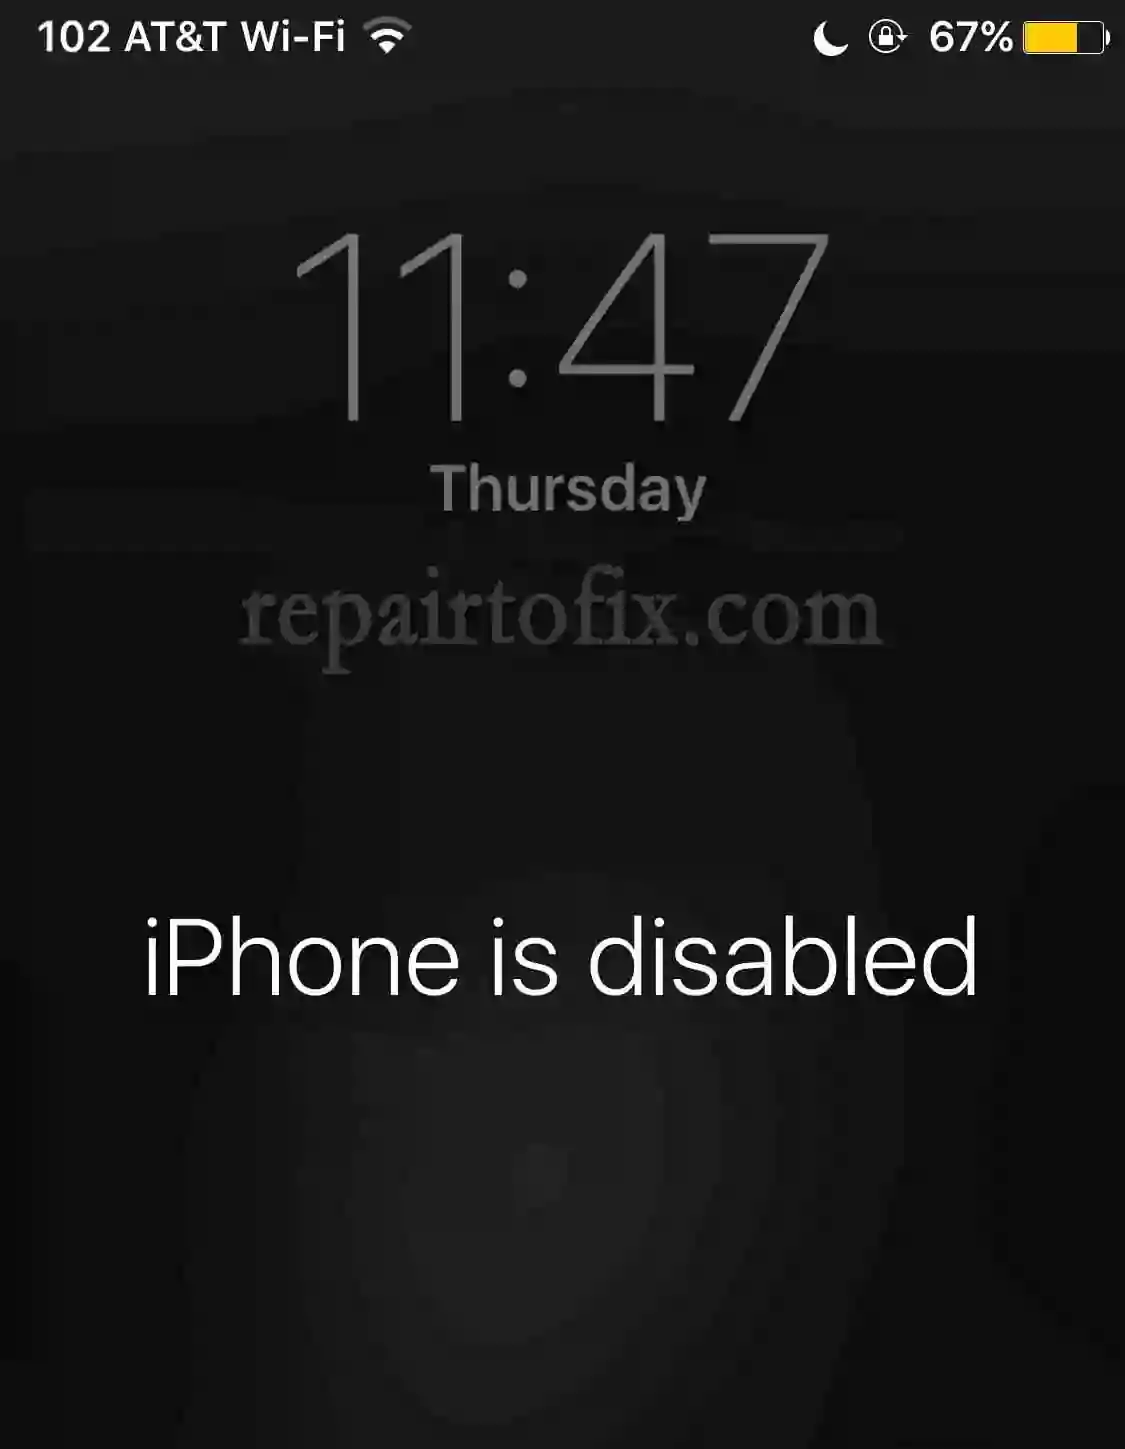
Seeing the "iPhone is disabled" message can be alarming. Suddenly, you're locked out of your precious photos, contacts, and apps. But don't panic! This guide will walk you through why your iPhone gets disabled, what the lockout periods mean, and most importantly, how to fix it and regain access to your device. We'll cover the official Apple methods and touch upon alternatives.
Understanding Why Your iPhone Says "Disabled"
The primary reason your iPhone becomes disabled is for security. To protect your personal data, iOS implements a lockout mechanism after too many incorrect passcode attempts. This typically happens if:
- You've forgotten your passcode.
- Curious children or friends tried (and failed) to guess your passcode.
- Accidental screen taps in your pocket or bag registered as multiple incorrect entries (often called "pocket dials" for passcodes).
While less common, a software glitch, particularly after an iOS update, or an internal time system issue could theoretically contribute. However, incorrect passcode entries remain the overwhelming cause.
"My iPhone is Disabled But I Didn't Do Anything!" – Is It Possible?
It's a common frustration: your iPhone is disabled, and you're sure you didn't enter the wrong passcode repeatedly. As mentioned above, accidental screen activation and touches in a pocket or bag are frequent culprits, leading to failed attempts without your direct knowledge. In rare cases, a software bug might be the trigger.
If you've purchased a used iPhone, it might have been disabled by the previous owner. Note that this is different from an Activation Lock (linked to "Find My iPhone"), which is a separate security feature. If the "iPhone is disabled" message is your main issue and you can't recall any passcode attempts, the path to resolution involves erasing the iPhone. Crucially, this means all data on the device will be lost if not previously backed up.
Can a Disabled iPhone Be Unlocked Without Data Loss?
Once your iPhone displays a message like "iPhone is disabled. Connect to iTunes" (or "Connect to a Mac/PC" on newer iOS versions), you can no longer unlock it by simply entering the correct passcode on the device itself. The lockout is too severe at this stage.
The only official way to regain access to a disabled iPhone is to erase its contents and then restore it from a backup (if available) or set it up as a new device. There is generally no way to bypass this security measure and keep your data intact once it reaches this stage of disablement.
Important: Erasing your iPhone will delete all data, including photos, messages, contacts, and apps. Regular backups are your best defense against permanent data loss.
How Long Will My iPhone Be Disabled? Understanding Lockout Times
Your iPhone doesn't immediately lock you out permanently. Apple uses a tiered system for incorrect passcode attempts:
- 1-5 incorrect attempts: No lockout. You can keep trying.
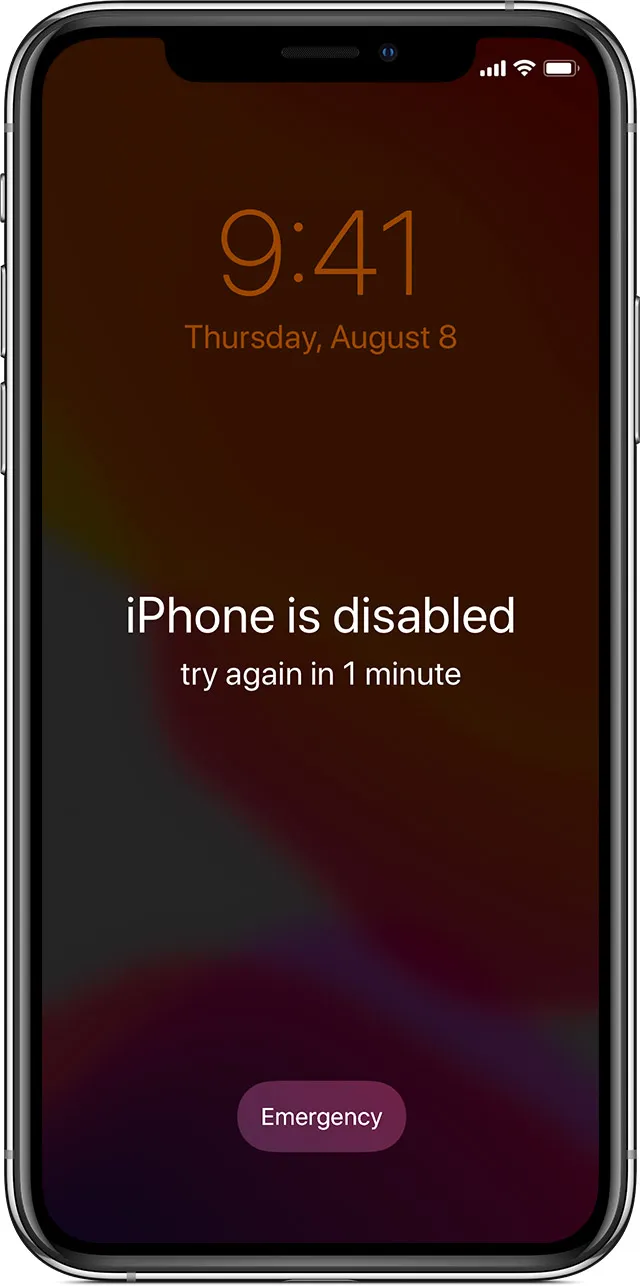
- 6th incorrect attempt: iPhone is disabled for 1 minute.
- 7th incorrect attempt: iPhone is disabled for 5 minutes.
- 8th incorrect attempt: iPhone is disabled for 15 minutes.
- 9th incorrect attempt: iPhone is disabled for 60 minutes (1 hour).
- 10th incorrect attempt: iPhone is disabled permanently. You'll see the "Connect to iTunes" (or computer) message. If you have "Erase Data" enabled (in Settings > Face ID & Passcode or Touch ID & Passcode), your iPhone might automatically wipe itself after 10 failed attempts.
Step-by-Step: How to Fix a Disabled iPhone
The primary and Apple-recommended method to fix a disabled iPhone involves using a computer with iTunes (for older Windows PCs or macOS Mojave and earlier) or Finder (for macOS Catalina and later). This procedure requires putting your iPhone into Recovery Mode and then restoring it.
Warning: This process will erase all data from your iPhone. If you have a recent backup (iCloud or computer), you can restore your data after the iPhone is reset. Without a backup, your data will be permanently lost.
Method 1: Using a Computer (iTunes or Finder) – The Official Fix
Step 1: Gather What You Need
- Your disabled iPhone.
- A compatible USB cable to connect your iPhone to a computer.
- A Windows PC (with the latest version of iTunes installed) or a Mac (with the latest macOS for Finder, or iTunes for older macOS versions).
Step 2: Turn Off Your iPhone
Ensure your iPhone is not connected to the computer yet. The method to turn it off varies by model:
- iPhone X or later, iPhone SE (2nd & 3rd gen), iPhone 8, iPhone 8 Plus: Press and hold the Side button and one of the Volume buttons until the "slide to power off" slider appears. Drag the slider.
- iPhone 7, iPhone 7 Plus: Press and hold the Side (or Top) button until the power-off slider appears. Drag the slider.
- iPhone SE (1st gen), iPhone 6s and earlier: Press and hold the Side (or Top) button until the power-off slider appears. Drag the slider.
Wait a minute to ensure it's completely off.
Step 3: Put Your iPhone into Recovery Mode
This is the crucial step. The button you press and hold differs by model. Connect your iPhone to your computer WHILE immediately pressing and holding the correct button. Do not release the button until you see the recovery mode screen on your iPhone (it usually shows a computer icon and a cable).
- iPhone X or later, iPhone SE (2nd & 3rd gen), iPhone 8, iPhone 8 Plus: Use the Side button.
- iPhone 7, iPhone 7 Plus: Use the Volume Down button.
- iPhone SE (1st gen), iPhone 6s and earlier: Use the Home button.
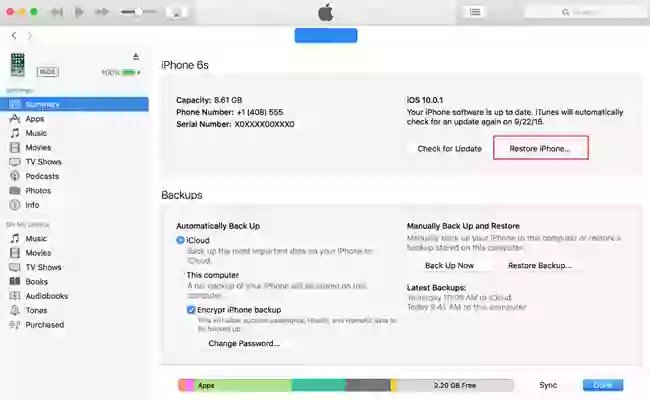
Step 4: Locate and Restore Your iPhone on Your Computer
Once your iPhone is in recovery mode and connected:
- On a Mac with macOS Catalina or later: Open Finder. Your iPhone will appear in the sidebar under "Locations." Click on it.
- On a Mac with macOS Mojave or earlier, or on a Windows PC: Open iTunes. Your iPhone should be detected in recovery mode.
Your computer will present you with a dialog box offering options to Restore or Update. Choose Restore.
Your computer will then download the latest iOS software for your iPhone and begin the restore process. If the download takes longer than 15 minutes, your iPhone might exit recovery mode. If this happens, let the download finish, then repeat Step 2 (Turn off iPhone) and Step 3 (Enter Recovery Mode).
Step 5: Set Up Your iPhone
Wait patiently for the restore process to complete. Your iPhone will restart. Follow the on-screen instructions to set it up. You'll have the option to set it up as a new iPhone or restore from an iCloud or computer backup if you have one.
Method 2: Third-Party iOS Recovery Tools (Use with Caution)
Various third-party software programs are marketed as "iOS System Recovery" tools. They often claim to fix disabled iPhones, sometimes even promising "no data loss." However, if your iPhone is already at the "Connect to iTunes" stage, data erasure is almost always unavoidable, as the core issue requires a full restore.
These tools typically automate the firmware download and restore process, similar to iTunes/Finder, but may offer a more guided or simplified user interface. If you decide to try one:
- Research carefully: Look for reputable software from well-known vendors. Be wary of unrealistic claims. Read reviews.
- Download from official sources: Only download from the software vendor's official website to avoid malware.
- Follow instructions: Connect your iPhone and adhere to the software's on-screen guidance. This usually involves selecting a repair mode, downloading firmware, and starting the process.
Note: While some users find these tools helpful, official Apple methods (iTunes/Finder) are generally the most reliable and secure. The primary advantage of third-party tools might be a more user-friendly interface for some, but they usually perform the same underlying restore function.
Preventing Future Lockouts & Key Takeaways
A disabled iPhone is a significant inconvenience, but it's ultimately a security feature working to protect your data. The most dependable solution involves restoring your device via iTunes or Finder, which unfortunately erases its contents.
Here are the key points to remember:
- Regular Backups are Vital: Regularly back up your iPhone to iCloud or your computer. This is your best insurance against data loss from any issue, not just a disabled device.
- Choose a Memorable Passcode: If you struggle to remember complex passcodes, consider a pattern you'll recall, or use Face ID/Touch ID as your primary unlock method (though a passcode is still required after restarts or for certain changes).
- Be Mindful of Accidental Touches: Keep your iPhone in a secure spot in your pocket or bag to minimize accidental screen activation.
We hope this comprehensive guide has helped you understand and resolve your disabled iPhone issue. Dealing with tech problems can be stressful, but with the right steps, you can get your device back up and running. For more troubleshooting tips and repair guides, explore other articles on RepairToFix.com!