Having a cluttered and full hard drive can cause your Windows 10 computer to slow down and become less responsive. By freeing up over 40GB+ of disk space, you can significantly improve the performance of your computer.
In this guide, we will walk you through the process of freeing up disk space on your Windows 10 computer. We'll show you how to remove temporary files, system error memory dump files, cache files, and more.
Here are the steps you need to follow to free up disk space on your Windows 10 computer:
- Go to the bottom left corner of the screen and click on the Windows logo.
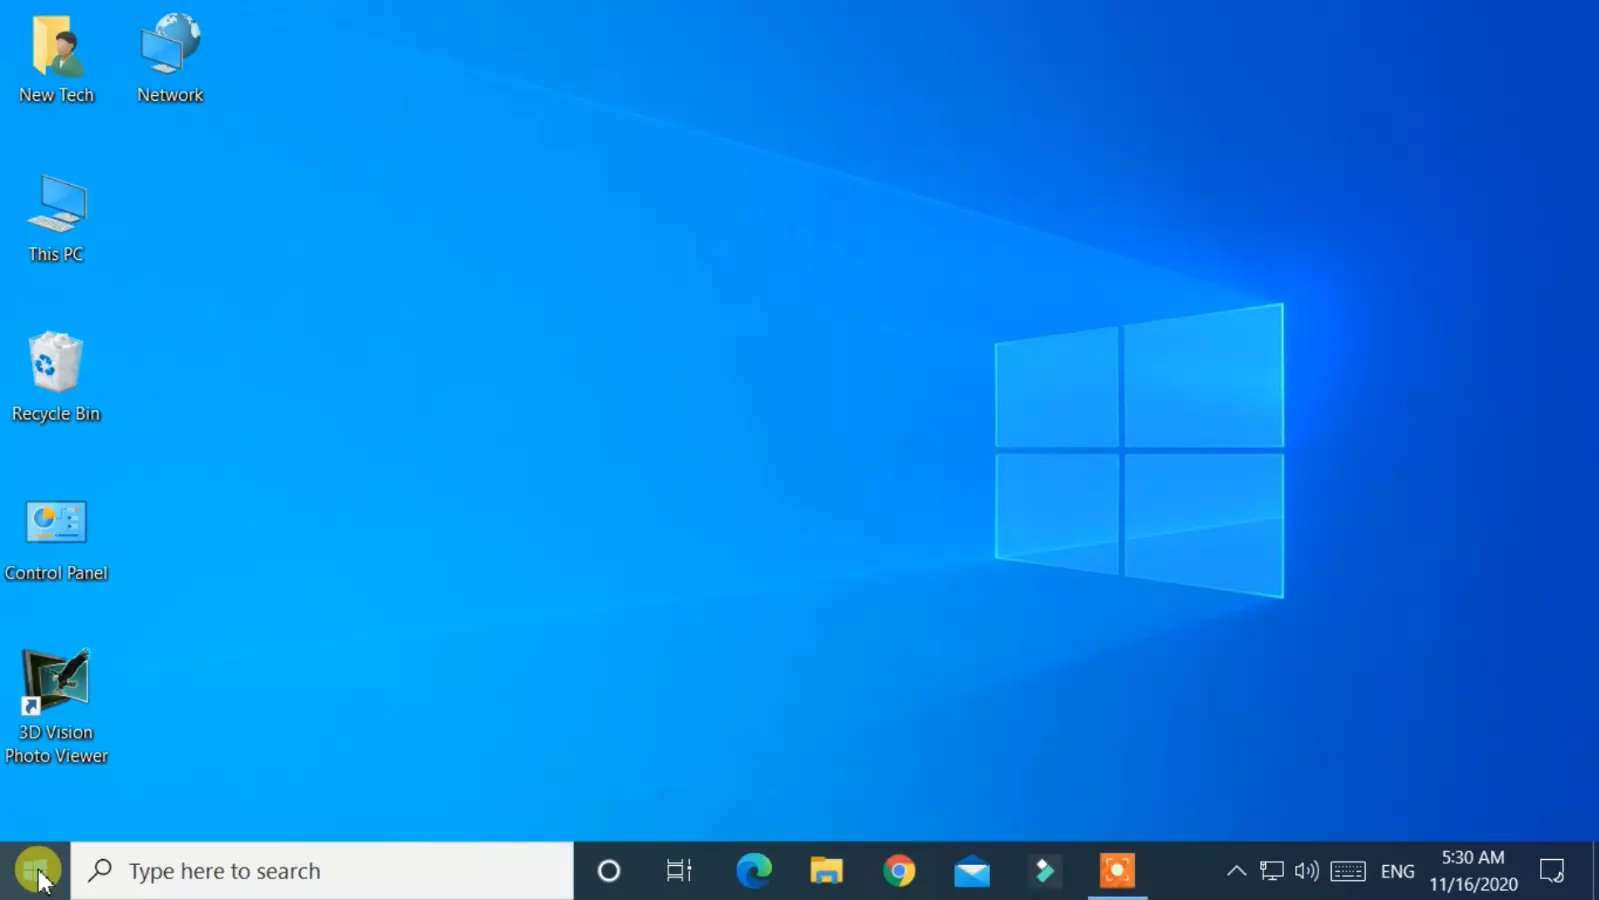
- Then, click on the Settings (gear icon).

- In the settings window, go to the first option, System.

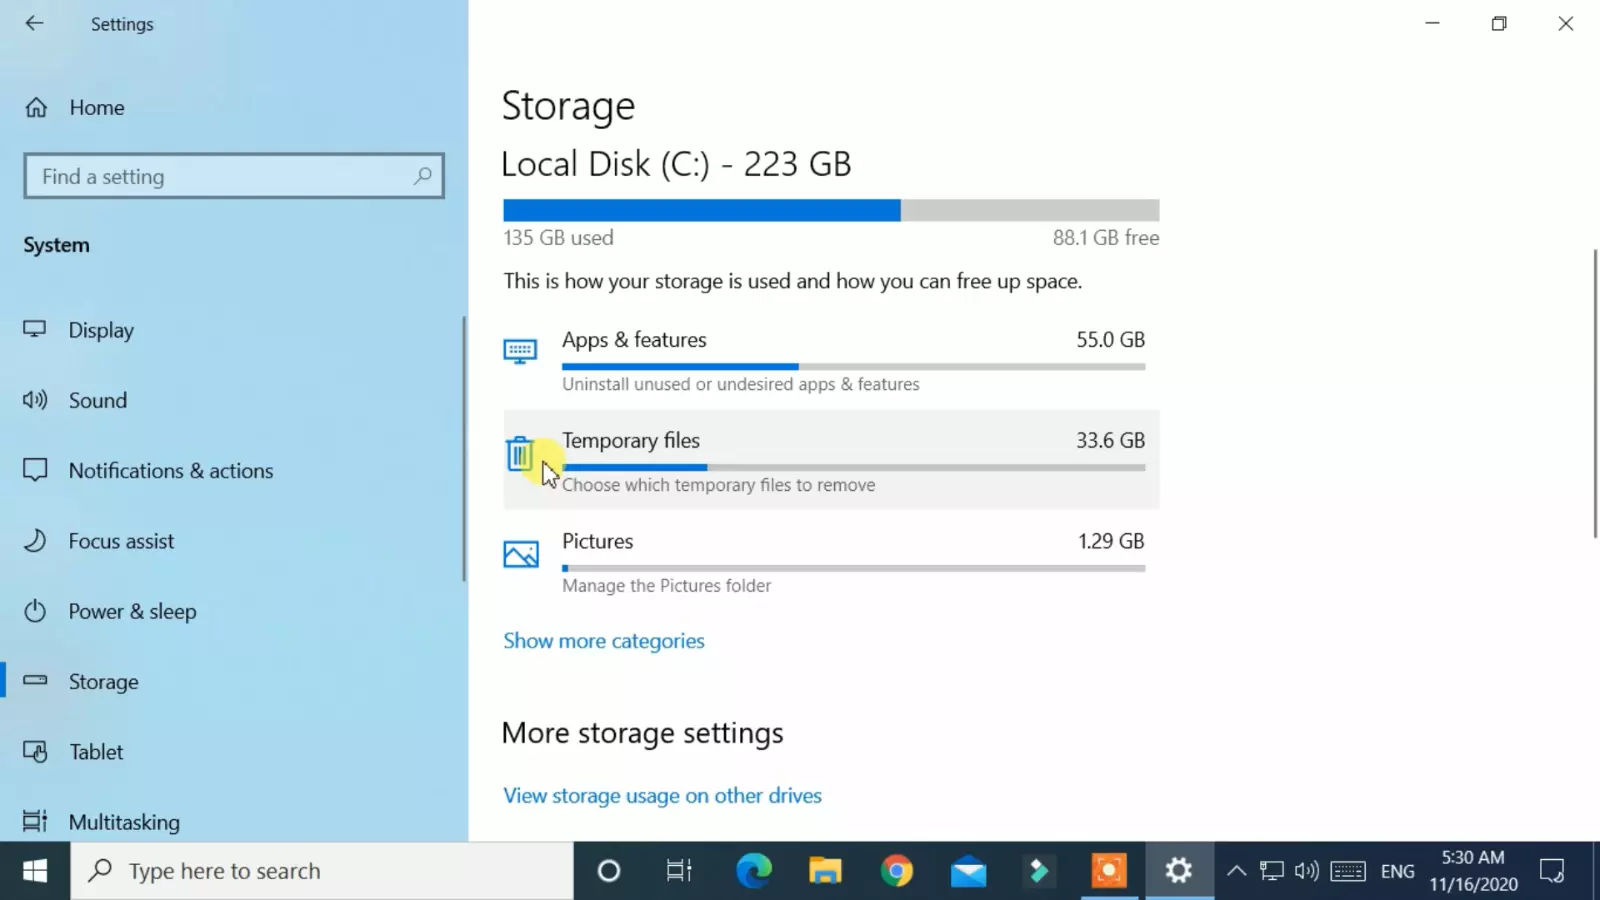
- In the System settings, select the Storage tab from the left-hand side.
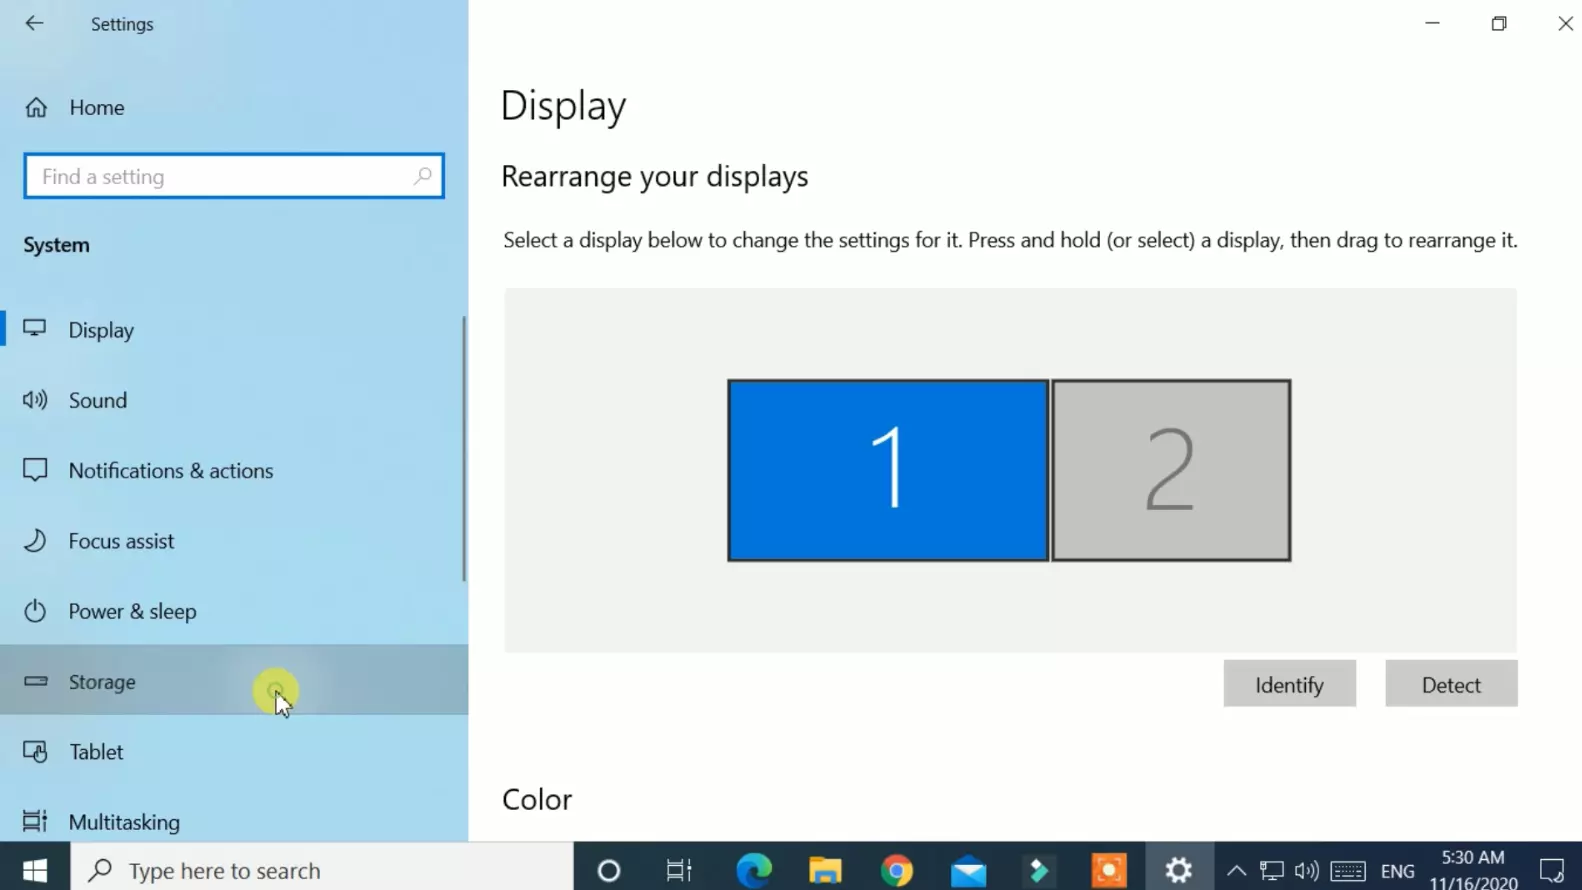
- Then, click on Temporary Files.
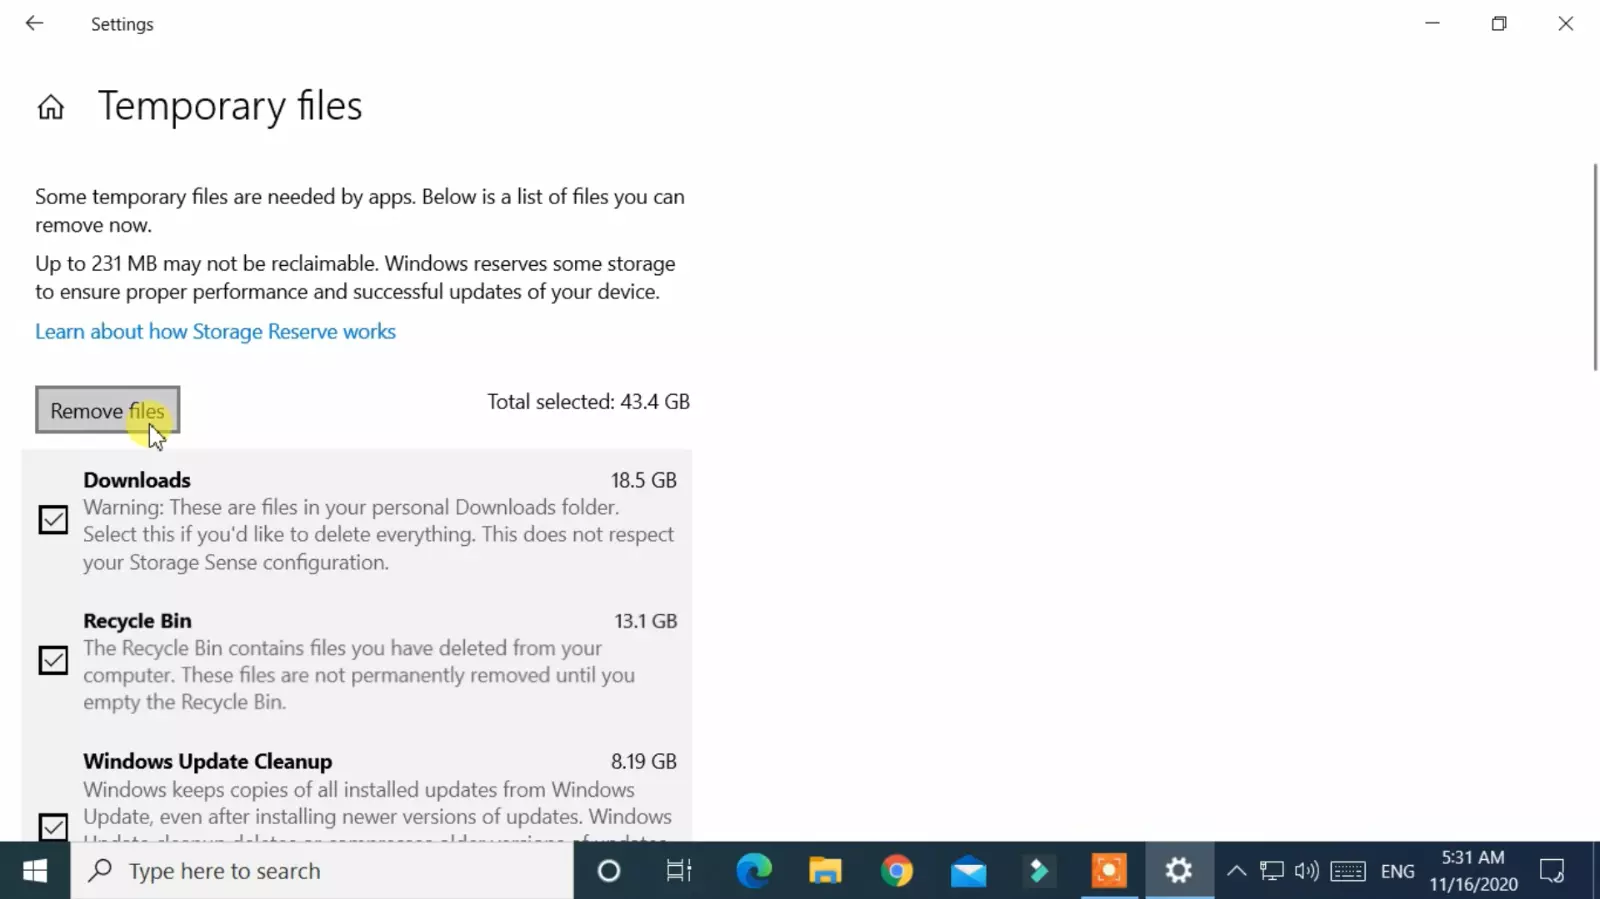
- After that, mark all the checkboxes.

- Now, click on the Remove button.
- After completing the cleanup process, close the settings windows.
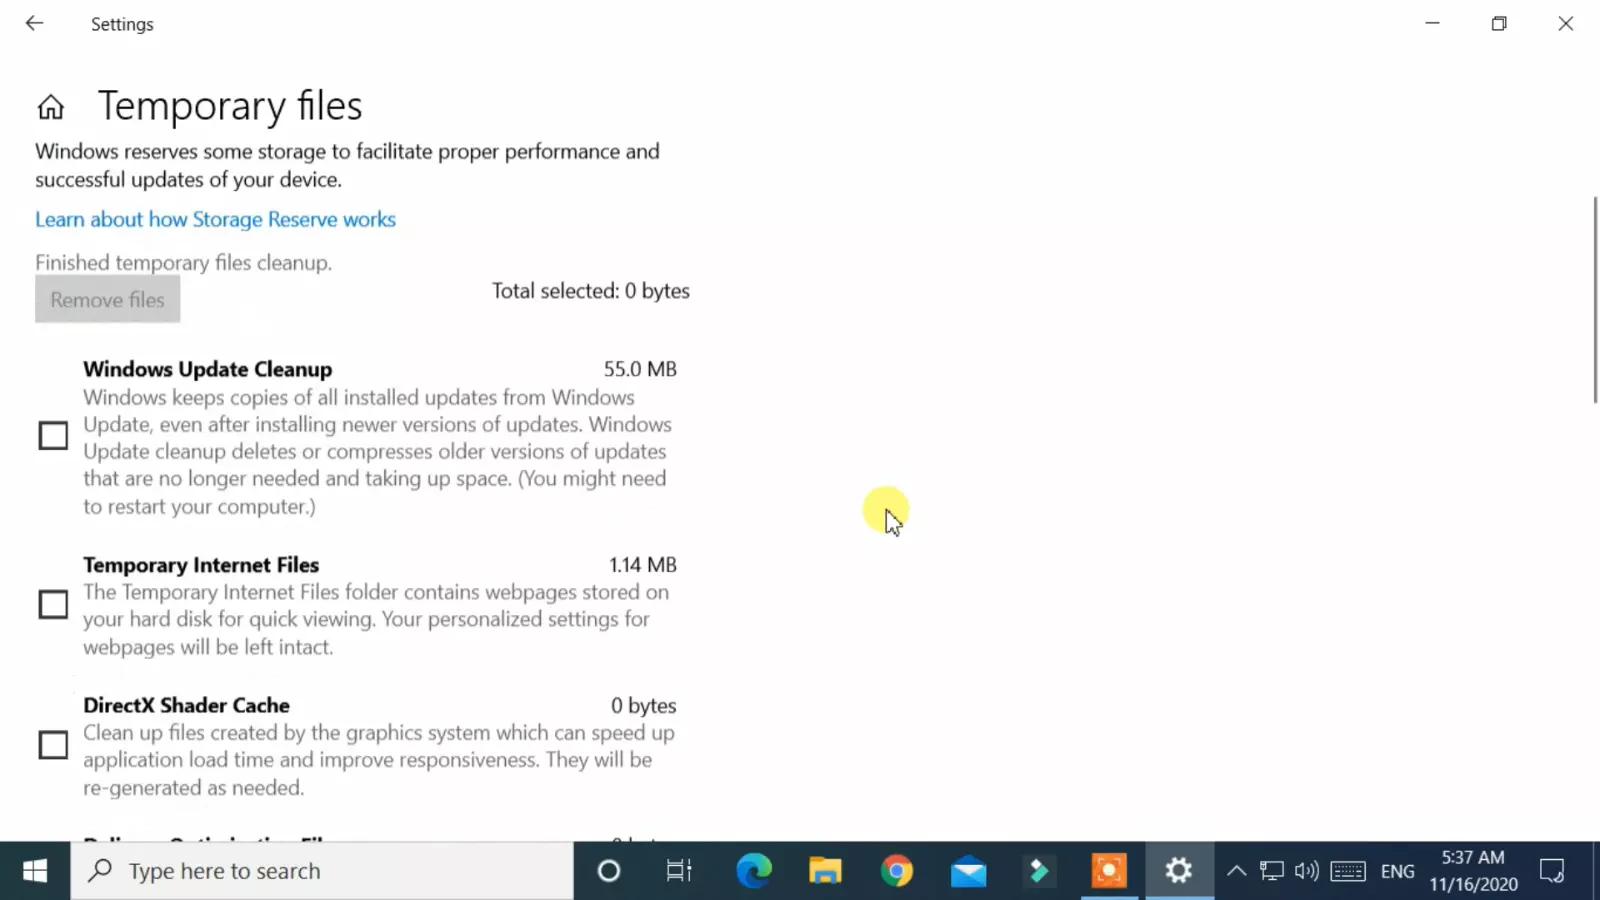
- Check your C:/ or Windows Install drive, you will find that over 40GB+ of disk space has been freed up.
By following these simple steps, you can free up valuable disk space on your Windows 10 computer, allowing it to run more smoothly and efficiently. So why wait? Start freeing up disk space on your computer today!
Advantages
- Save your time, rather than deleting files one by one.
- Increase in PC performance.
- Make Recycle Bin empty.
- Previous Windows Installation files also deleted if available.
- Deletes all files from Windows Download Folder.
- Remove system error memory dump files.
- Delete some systems downloaded files that are not currently used.
- Delete cache files and so on.

